Madeleines are an exquisite simple treat in themselves, no need for Proustian prose to appreciate them – the delicate texture and ever so slight crunch on the outside, the delicious signature dome, a touch of orange zest, YUM!
They take about 5 mins to prepare and bake in 7 mins – it’s one of the fastest and prettiest treats you can magic up at speed!
And their shape is just so lovely and unusual… This is again where silicon moulds are brilliant, you can buy them online for a few pounds, and they are so quick to make that it’s really worth the investment.
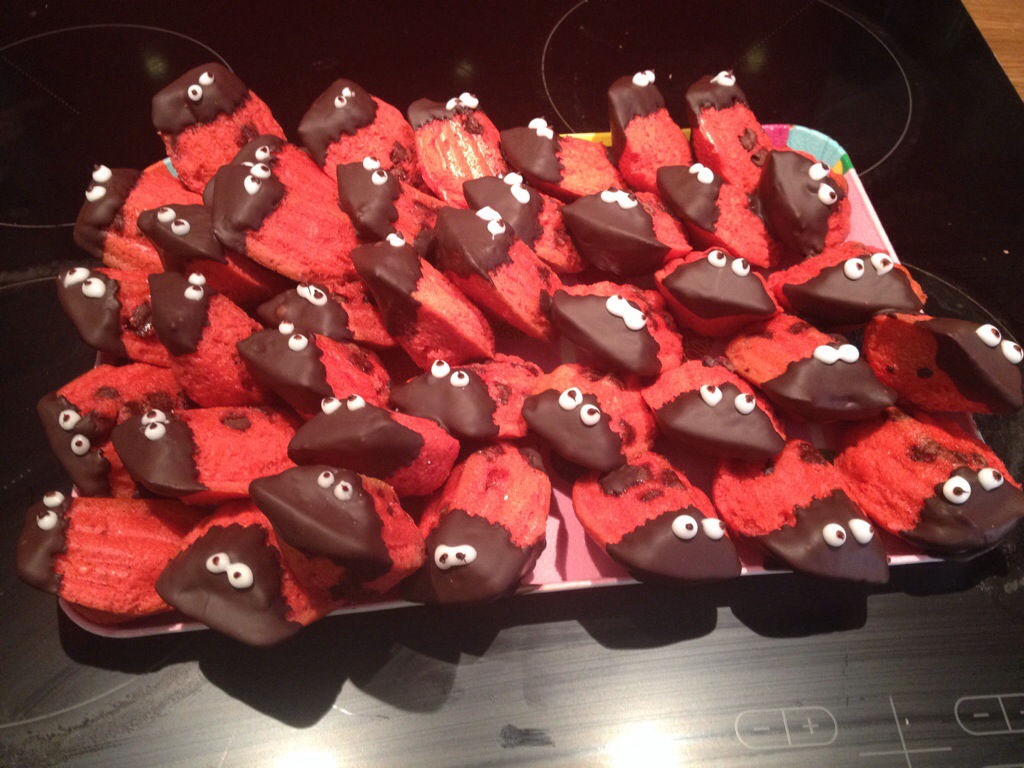
A couple of years ago, we were invited to a ladybird party, and it struck me that they could easily disguised themselves as pretty bugs.
A little food colouring, a few chocolate chips, a dip in dark chocolate, et zoup! Here we have it! Ladybird madeleines… This time around, I also added eyes for a more animalistic version, with a simple fondant and more dark chocolate.
The recipe is ever so simple, but as ever, follow all the steps or it won’t work!
You will need:
110g butter
125g sugar
2 whole eggs
110 flour
1 teaspoon baking powder
1 pinch of salt
zest of an orange
Optional
Red colouring (a few drops)
75g Chocolate chips
50g dark chocolate
50g icing sugar
1-2 teaspoon water
What to do:
Before anything else, preheat your oven at 210 celsius (quite high but they bake fast!)
1. Start by melting the butter – 30 to 60 seconds in the microwave should do it (best cover it as can jump and be messy if gets too hot) – leave to cool down while you do the rest (doesn’t need to be cold though – lukewarm is fine, to avoid cooking the eggs)
2. Bring together all the dry ingredients (flour, sugar, baking powder, salt) by giving a quick whisk
3. Grate the zest of the orange an add to the mix. Just the orange bit, no white pit (that’s the bitter bit!)
4. Add the 2 eggs and combine until just incorporated. Don’t beat it hard, the point is to not add too much air to the mix
5. Add the melted butter again until just incorporated. This is a good time to add colouring if you want to do the ladybird version. I recommend Wiltons colourings, supermarket ones just never give enough colour. You can get them online or in good cooking shops
6. Optional again, fold in a packet of chocolate chips
7. If you have time, it’s recommended to leave the mixture to rest in the fridge for an hour to allow a better rise, and it will also be easier to spoon into the moulds – however if you haven’t got the time or can’t be bothered to wait, you can skip this step.
8. Butter your moulds then fill each cavity to 3/4, no more, as the cakes will expand.
9. In the oven for 7-8 minutes, or until the dome is nice and risen – sign that they are cooked through. They do risk getting a little too crispy if you leave them for more than 10 minutes, so make sure you put the timer on.
10. Leave them to cool a few minutes before removing from moulds.
At this stage, they are really quite lovely in themselves.
If you really want to go the full ladybird, melt your dark chocolate in 2 30 seconds burst in the microwave (easy to burn!) then dip each ‘head’ (the flat bit of the cake) in the chocolate. Leave to dry if you have time or accelerate by sticking in the fridge for 10 minutes.
Once dry, mix the icing sugar with a little water until you have a THICK paste.
Best thing is to pipe small blobs for the eyes. They will dry in 5 mins.
Then with the blunt end of a skewer, dab tiny plops of melted dark chocolate on the white.
Leave to dry for another few minutes (or fridge) – you’re done…
